Table of Contents
Green Houses
DIY greenhouse: Five tips for easy success
Infromation Source: http://www.mnn.com/the-home/gardening-landscaping/stories/five-tips-to-not-screw-up-your-diy-greenhouse
- 1) Location
- 2) Size
- 3) Foundation
- 4) Materials
- 5) Instructions
- 1)Location: The first step is to figure out the perfect spot, which is important for several reasons. Consider lighting. Make sure to select an area with maximum exposure to sunlight, especially if you're putting up solar panels. If your greenhouse ends up in the shade, no matter how pretty it looks your plants won't grow – or at least not well. Six hours minimum of sunlight each day is best, morning sun being preferable. If you can't avoid surrounding trees, try to make sure the location will get that early light if nothing else. Also, if you're in a colder region, position your greenhouse running east-to-west lengthwise – this helps pull in more heat from the winter sun. Another question to consider is which utilities you'll need. Select a spot with easy access to water, heat and electricity. Finally, consider a greenhouse location with good drainage. To avoid having a swamp instead of a floor, build the foundation at a high point or above the surrounding ground. Then the trick is to find the perfect place that meets all the above requirements!
- 2)Size: Now that you've gotten the location down, decide how much space you'd like. Then ask yourself how much space you might want for your DIY greenhouse in five years, and consider a size that will give you room to, well, grow. Many gardeners build their first greenhouses conservatively only to later wish they had more room. Before building the largest greenhouse imaginable, however, consider budget – the biggest operating cost for a greenhouse is heating in winter. Factors to help determine heating costs are climate conditions and the requirements of the plants you'll be growing.
- 3)Foundation: Take care to build a solid foundation on which your DIY greenhouse will rest. A common error for many first-time greenhouse builders is constructing an uneven foundation. Make sure the surface on which your greenhouse will rest is smooth, level and stable. While some people put down wood or concrete as flooring, it's actually not necessary. Leaving the ground exposed is not only more environmentally friendly, it also allows you to plant things right in the floor of your greenhouse.
- 4)Materials: Think about what kind of building materials you'd like. Greenhouse kits come with several types of frames, the most common being wood or aluminum. Because it's maintenance-free, aluminum is more convenient and conducive to busy lifestyles. But while wood requires more maintenance in humidity, it's a renewable resource and looks attractive and natural on a greenhouse. If you decide to go with wood, avoid treated wood – FSC-certified cedar works well. Then consider what type of panels you'd like to cover the frame. You'll have a selection of glass and plastics. Consider polycarbonate, a type of virtually unbreakable plastic and the latest addition to greenhouse supplies. This substance provides a full spectrum of light while filtering out ultraviolet rays. It's also lightweight, inexpensive and has a major advantage over glass – it can't be broken by the neighbor boy's baseball.
- 5)Instructions: It's so basic it's insulting, but most of us are guilty of not doing this at one time or another. Follow the kit's instructions completely. Don't cut or alter parts, or try to build on instinct. The instructions are your map, your guide. So pick them up – your greenhouse is waiting.“
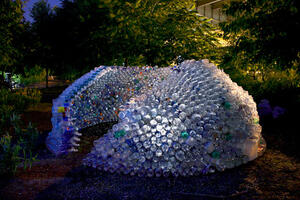
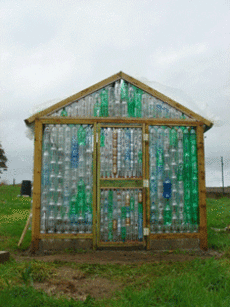
BUMBERSHOOT 2008/ The Plastic Bottle Greenhouse
photo by George Hirose
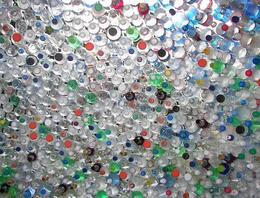
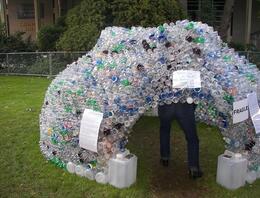
“BUMBERSHOOT 2008: The Plastic Bottle Greenhouse This year, Americans will drink more than 30 billion single-serving bottles of water. To raise awareness of the alarming problem of plastic waste, Jasmine Zimmerman created the Bottle House - an open-roofed greenhouse made from hundreds of recycled plastic bottles. It’s an excellent example of repurposing a harmful and overlooked material into one that will grow vegetation, and Jasmine plans to exhibit the greenhouse in empty lots, rooftops, parks, and vacant buildings to help spread the word. We caught up with the structure in Seattle at Bumbershoot 2008, where it was joined by a number of socially and environmentally charged installations and performances. According to the Container Recycling Institute, Americans drink 70 million disposable bottles of water each day, with a meager 10 million making their way to a recycling bin. Although we’re not sure about the gobs of hot glue holding the Bottle House together, we love the way Jasmine has recycled the cast off containers into a greenhouse capable of breathing life through the discarded plastic bottles. Jasmine Zimmerman is an internationally exhibited American artist recently awarded an artist residency at Tacoma’s Museum of Glass.”
information source: http://www.inhabitat.com/2008/09/24/jasmine-zimmerman-bottle-house-at-bumbershoot
Hippychick's Adventure to Sustainable Happiness
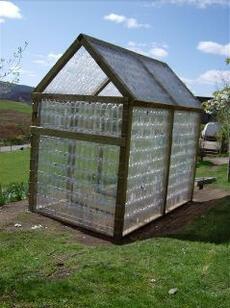
green house made out of the recycled plastic bottles. school project made in US: http://www.stbernadettesschool.eu/links/green.html
“life of a girl, two boy cats, lady chickens and meatie chickens who come and go making efforts to live simple. growing veggies, fruit & flowers, saving rain from the sky & celebrating the wonder of the almighty pile de compost. she learning the art of putting up foods, propagating plants, raising farm-ish creatures and most importantly, sharing with family, friends and neighbors. indoor cat a.k.a. mr. t-supercat serving as chief interior bug catcher, squirrelspeak translator, chickenspeak translator and lizard lizard translator. indoor/outdoor cat a.k.a opera kitty serves as protector of the chickenchicas and entertains us all with his mawwrvolus singing. in short it's about we, the family of many a varied creature on an adventure with our dirty nails, toes, paws and chickeny feet as we dig our way through the days.”
information source: http://hippychicksgarden.blogspot.com/2007/11/basil-and-string-beans-for-breakfast.html
Poor Man’s Greenhouse …
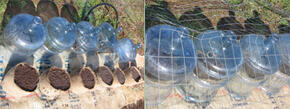
”…can be made with recycled materials. Companies that sell bottled water have tons of damaged bottles. The bottoms of these bottles can be cut off with a circular saw or jigsaw to form a small greenhouse that offers protection to your plants or seedling from cold weather. The pots are made of old burlap coffee bags that have been cut up and sewn to desired height and diameter. The burlap pots are filled with a potting mix which is a combination of sand, peat moss and organic compost. Sow the seeds in this mix and mist them gently with water. Place the water bottles over the pots as shown with the neck up. The bottle neck should not be closed unless the weather gets extremely cold. It provides ventilation in case the air inside your little greenhouse gets too hot. Place some old wire fencing on top of the bottles to prevent them from being blown over by wind. In warm days it is easy to uncover the pots and expose your seedlings to the outside weather and start getting them acclimated for transplanting. When cutting the plastic water bottles, a lot of plastic sawdust is created. Be careful to dispose of it properly.“
information source: http://fruit-tree.com/blog/?p=24
and more on Hair & Ashes
”…adding hair to your soil can greatly quicken the germination of seeds and accelerate the growth of the sprouts……“ http://fruit-tree.com/blog/?cat=11
Recycled Greenhouse
… by Christopher Pepe
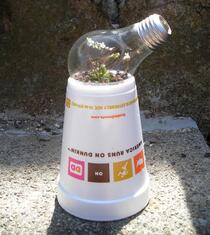
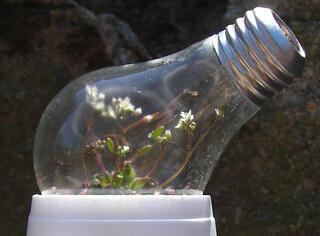
”….It's Earth Day today so I wanted to do something that I've been meaning to for a while. I had hollowed out a lightbulb but never found a project for it and as I was sipping my coffee I realized that while 'America Runs on Dunkin' it also generates tons (literally) of garbage as we become increasing a single use society. Another bit of insiration for this 'out with the old' project is that Home Depot is giving away 1million compact flouresent lightbulbs today in celebration of Earth Day. This old incandescent bulb was just burning up precious watts (60W vs an equivelent 9W CF bulb). Still I used a dead bulb for this project - no sense in breaking a working lightbulb.
howto: I cut the bottom out of the DD cup to make a cradle for the light bulb to sit in. Hollowing out the lightbulb is a bit more involved but is pretty easy so long as you are careful. The flower is growing in a 50-50 mix of inert media (pourous rocks for hydroponics) and potting soil. Much like building a ship in a bottle, most of the work of potting the flower was done with bamboo skewers inside the bulb. “
Information source: http://tearsoffire.org/twiki/bin/view/Projects/RecycledGreenhouse
HOWTO-Hollow out a light bulb: http://blog.makezine.com/archive/2006/05/how_to_hollow_out_a_light_bulb.html
DIY Mini-Greenhouse
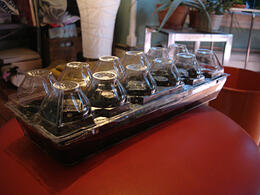
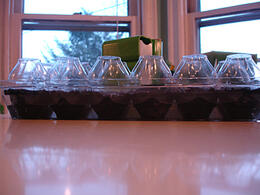
“Here’s another, do-it-yourself seed starting setup that self waters, creates a cozy greenhouse to start seedlings, and is super easy to make. All you need is one of those ridiculously overplasticized Eggland’s Best egg cartons (I will never understand why they use three layers of plastic for their cartons, but for starting seeds, it’s perfect). To make this mini greenhouse, cut the top off the egg carton and save. Then, take a safety pin, and poke a hole out of each of the 12 egg shapes (this is where the water will go up to the roots). Put the top underneath the egg carton, and fill with soil and seeds. Then, water, and use the old top (now on the bottom) as a reserve. The perfect egg carton greenhouse!”
Information source: http://growindie.com/2009/03/07/diy-mini-greenhouse/
DIY Seed Starting Kit
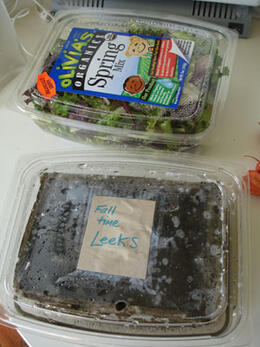
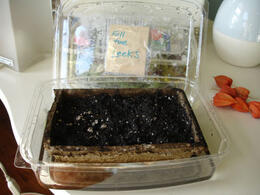
turn a salad container into salad with this DIY setup
“In the spirit of precycling and saving money, be resourceful this year and make your own seed starting kit. It’s actually so easy, I can’t believe I haven’t started doing this sooner. Just take a large plastic salad container, and place smaller grow containers inside. (I save the ones I get from nurseries—you can use cut up egg cartons with a small hole in the bottom of each cell as well.) When you put the plastic top on, it creates a mini greenhouse, and the water reserve self waters the seedlings from the bottom, so they are low maintenance as well. After the seeds sprout, take the lid off and voila! An easy, diy seed starting set that costs nothing. I’m used these to start my Falltime Leeks and Red Cipollini Onions today and will post pics as they grow.”
Information source: http://growindie.com/2009/02/10/diy-seed-starting-kit/
DIY Mini Greenhouse/Willi's Garden
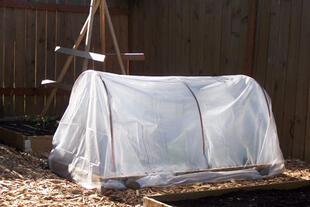
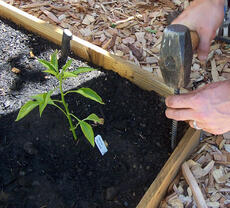
”….We constructed our little greenhouse with rebar, copper tubing, and plastic sheeting. As the summer warms, I’ll probably take off the plastic and replace it with TufBel—an extremely durable row cover developed in Japan. Tufbel lets in tons of light and it will keep the peppers warm without baking them (peppers tend to drop their blossoms if temps rise over 80 degrees F or drop below 60 degrees F at night). I’m also planning on leaving the hoop house up over the winter and growing spinach, cold hardy lettuces, kale, and chard inside….“
Information source: http://www.digginfood.com/2008/06/diy-mini-greenhouse/
Klorofil
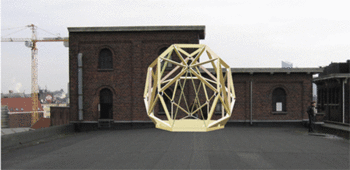
“klorofil promotes urban agriculture through the use of ‘lost’ space in the city, mainly focusing on the use of rooftops. it is a participatory and multidisciplinary project, bringing together agriculture, gastronomy, art, science, education, architecture and urban planning. klorofil’s final goal is the construction of a number of greenhouses on rooftops in the center of the city of brussels, incorporating multiple units: a gardening & growing unit, a restaurant & bar unit, and a multifunctional art & laboratory unit. to gradually introduce the concept of urban agriculture using ‘lost’ space, a series of smaller-scale projects are developed, such as portable gardens and agriculture-at-home. wherever possible and feasible klorofil’s different development stages respect the principles of recycling, passive housing and cradle-to-cradle, aiming at a minimal overall ecological footprint ”
Information source: http://www.klorofil.be/mission/
Growing Spaces
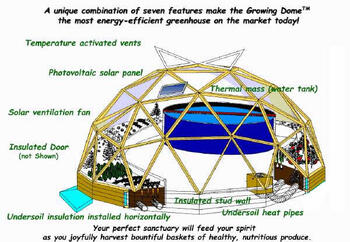
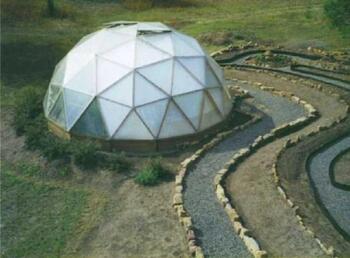
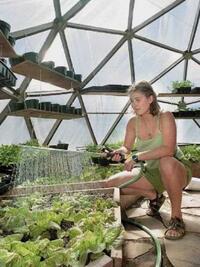
“Many people are rediscovering the benefits of nutritious, locally fresh, organic vegetables, fruits and herbs. In the U.S.A. today over 4000 Farmers markets are taking the place of old town squares which shows that people desire quality, fresh, affordable foods. Our first desire was to address this need by creating the backyard Growing Dome in the Rocky Mountains where buying Organic food is expensive and the short growing season and wildlife make gardening almost impossible.”
Information source: http://www.growingspaces.com/vision.htm
Greenhouse Window
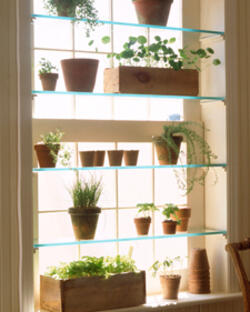
“Instead of spending the winter gazing through glass panes at frozen flower beds, transform a window into a mini-greenhouse where herbs, houseplants, and even little pots of grass will thrive. For best results, choose a large inset window that receives lots of light.
- 1.To determine the dimensions of the shelves, measure the depth and width of the window frame, and subtract 1/2 inch from thewidth.
- 2.Have a glazier cut a 1/2-inch-thick piece of glass to size for each shelf; for a more finished look, have the edges sanded. Using a level and a ruler for precision, make pencil marks where each shelf support should go, starting from the top of the window frame.
- 3.Make supports out of molding, available at hardware stores: Using a hand saw, cut two lengths of molding for each shelf (the molding length should equal the depth of the frame). Sand the ends smooth.
- 4.Drill three evenly spaced holes (just bigger than the head of a wood screw) in each support. Hold a support against the appropriate mark on the window frame, insert the bit of an electric drill through one of the holes, and drill a starter spot into the frame. Repeat for the other holes, then countersink screws so the heads don't show. Repeat for remaining supports. Fill holes with wood putty, sand smooth, and paint supports. Once paint dries, attach a felt dot or plastic glide to each support end, and set glass shelves in place.”
Information source: http://www.marthastewart.com/portal/site/mslo/menuitem.0e0eb51a2e6b5ad593598e10d373a0a0/?vgnextoid=4b8d76ecfd22f010VgnVCM1000003d370a0aRCRD&rsc=also_try_p1
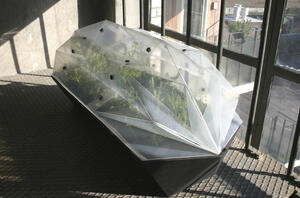
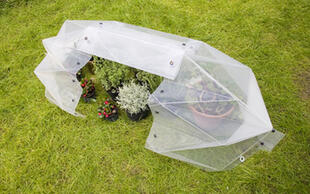
Foldable Greenhouse by Daniel Schipper
“If you have ever wished you could have a verdant garden in your urban apartment but didn’t have the luxury of space, Dutch designer Daniel Schipper, may have come up with a solution, with his Foldable Greenhouse prototype. Made from recyclable plastics (the top appears like translucent polypropylene), the greenhouse is noteworthy in that it unfolds in origami fashion from flat plastic stock, is potentially modular, and with its compact form factor, is practical for balconies, small yards or rooftop decks and gardens. It also incorporates the same design and engineering approach as one of Schipper’s other products, a dramatically foldable/collapsable shelter he made from misprinted milk packaging.
The designer is even accepting email inquiries from those interested in investing in and manufacturing the greenhouse, a product with some great potential applications, especially in light of the trend of ever increasing migration to urban centers. And perhaps taking a cue from his Foldable Shelter, Schipper could consider incorporating recycled plastic from those ubiquitious (and often non-recyclable) throw away planters one sees at many flower stores and garden centers, as Recycline does with used yogurt containers. Surely the Foldable Greenhouse is a great suggestion of a range of products that could be developed for urban gardeners-to be, who only wished they had the space!”
Information source: http://blog.ecolect.net/tag/collapsible/
eight square meters
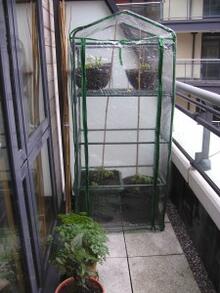
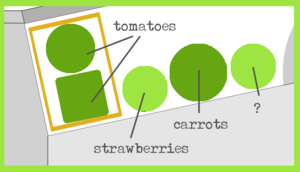
Small part of very nice project by Computer Science grad student, from Ireland, who growing some his own food in 3rd floor apartment in Dublin:
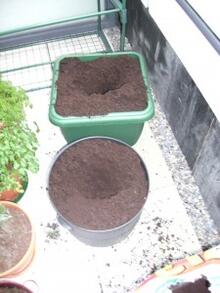
- 1. Find a container about 40 cm deep to transplant into, one for each plant.
- 2. Fill 2/3 with compost.
- 3. Make a well in the centre of the compost as far down as you can. My well was about 25 cm.
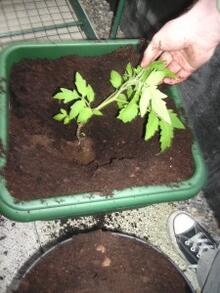
- 4. Upend the tomato plant’s current pot to remove it. You may want to gently loosen some of the roots to encourage them to spread.
- 5. Place the plant in the well and fill around it with more compost. Don’t worry if some leaves are covered. The deep transplanting encourages root growth throughout the container. Maximizing space and resource usage is the name of the game!
- 6. Place a stake of some kind (I used bamboo) alongside the stem of each plant. The tomato can then be tied to this as it grows to help it stay upright. Adding a stake later may disturb the roots so it’s best to do at the same time as transplanting. With little wind in the greenhouse, the stem will not strengthen as it would outside.
- 7. Water the plants with some tomato fertilizer. Generic fertilizers might have too much nitrogen and cause excessive foliage growth. A good deal of water will help the newly transplanted plant to bed-in well.
Information source: http://www.eightsquaremetres.com/2009/03/balcony-garden-diagram-plan.html
Worldwide Greenhouse
http://www.flickr.com/photos/sndrv/3100750997/in/photostream/
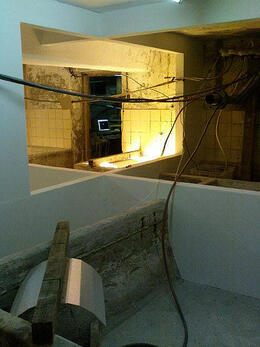
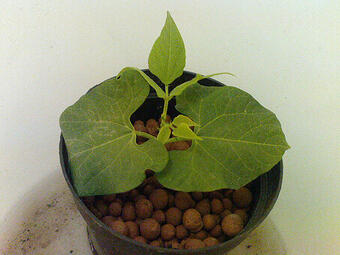
“The plants were growing in a temporary greenhouse built in the basement of a former cheese factory in Kolderveen, The Netherlands. Nowadays, the space is is transformed into an artist-in-residence location, maintained and managed by Stichting KiK. During the months of november and december 2008, the Dutch art collective 'Collectief Mei 2007' were the artists in residency, working on a collaborative project called '3×3'. The Worldwide Greenhouse is one of the projects realized as part of the '3×3' exhibition. The growth of the plants is an indication of the reach and publicity of the '3×3' project's website.”
Information source: http://www.collectiefmei2007.nl/greenhouse/
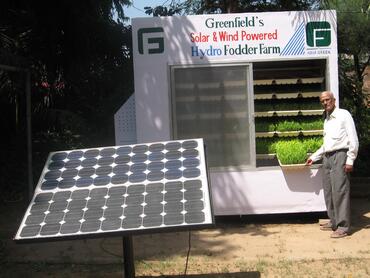
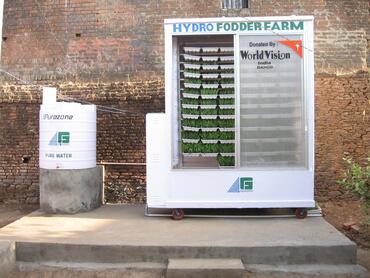
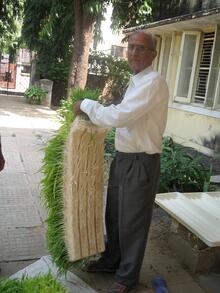
Greenfield Foundation and Solar & Wind powered portable Greenhouse
Combating Starvation and Deforestation Worldwide…
Information source: http://www.greenfield-ngo.org/dairy.html http://www.greenfield-ngo.org/saladbar.html
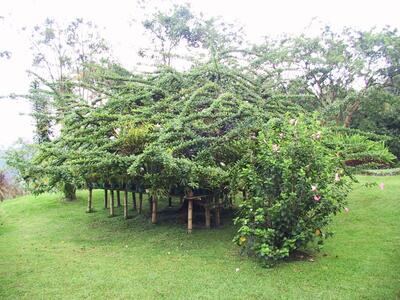
Chorizo's Greenhouse
“here is Chorizo's greenhouse, I guess he took the name literally and came up with a green house! Chorizo grows orchids, thousands of them and I spent 2 days just photographing flowers.”
Information source: http://www.orchidspecies.com/colombia06.htm
The Greenhouse By Joost
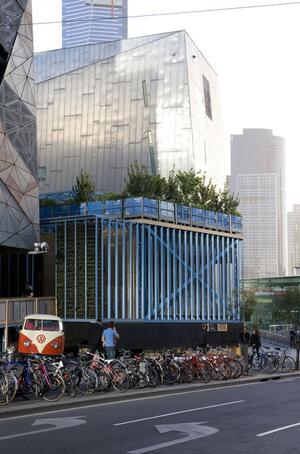
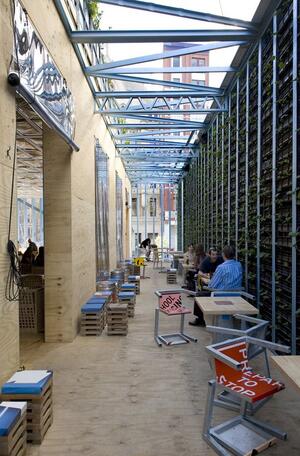
“The Greenhouse by Joost is an Australian first in sustainable design and innovation. Built entirely from recycled and recyclable materials. Constructed entirely from recycled and/or recyclable materials the Greenhouse was built to inspire and challenge “the current vernacular on minimizing the impact on the planet, whilst dishing us deugstation fair and operating as a unique gallery, cafe, bar and public space… it would also educate, generate debate, and serve as a model for a cheaper, more spirit-lifting form of public housing in our suburbs.”
Information source: http://www.designtavern.com/2008/12/05/the-greenhouse-by-joost/ http://www.greenhousebyjoost.com/design/about-us/joost/
The Greenhouse Nightclub
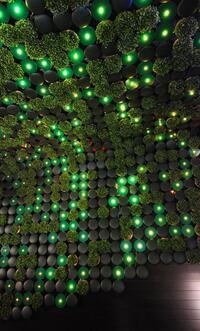
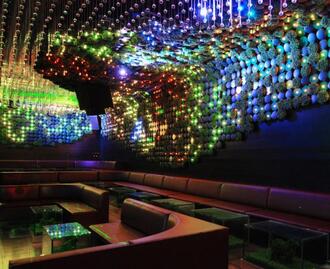
“The Greenhouse Nightclub in New York City is the first L.E.E.D. registered, eco-friendly nightclub in the United States. A bi-level 6,000 square foot club, lounge and event space built from recycled or recyclable materials, GREENHOUSE is the first nightclub in the nation to receive certification by the United States Green Buildings Council for its environmentally conscious construction and design. ”
Information source: http://secretsocietynyc.wordpress.com/2009/03/30/the-greenhouse-nightclub/

